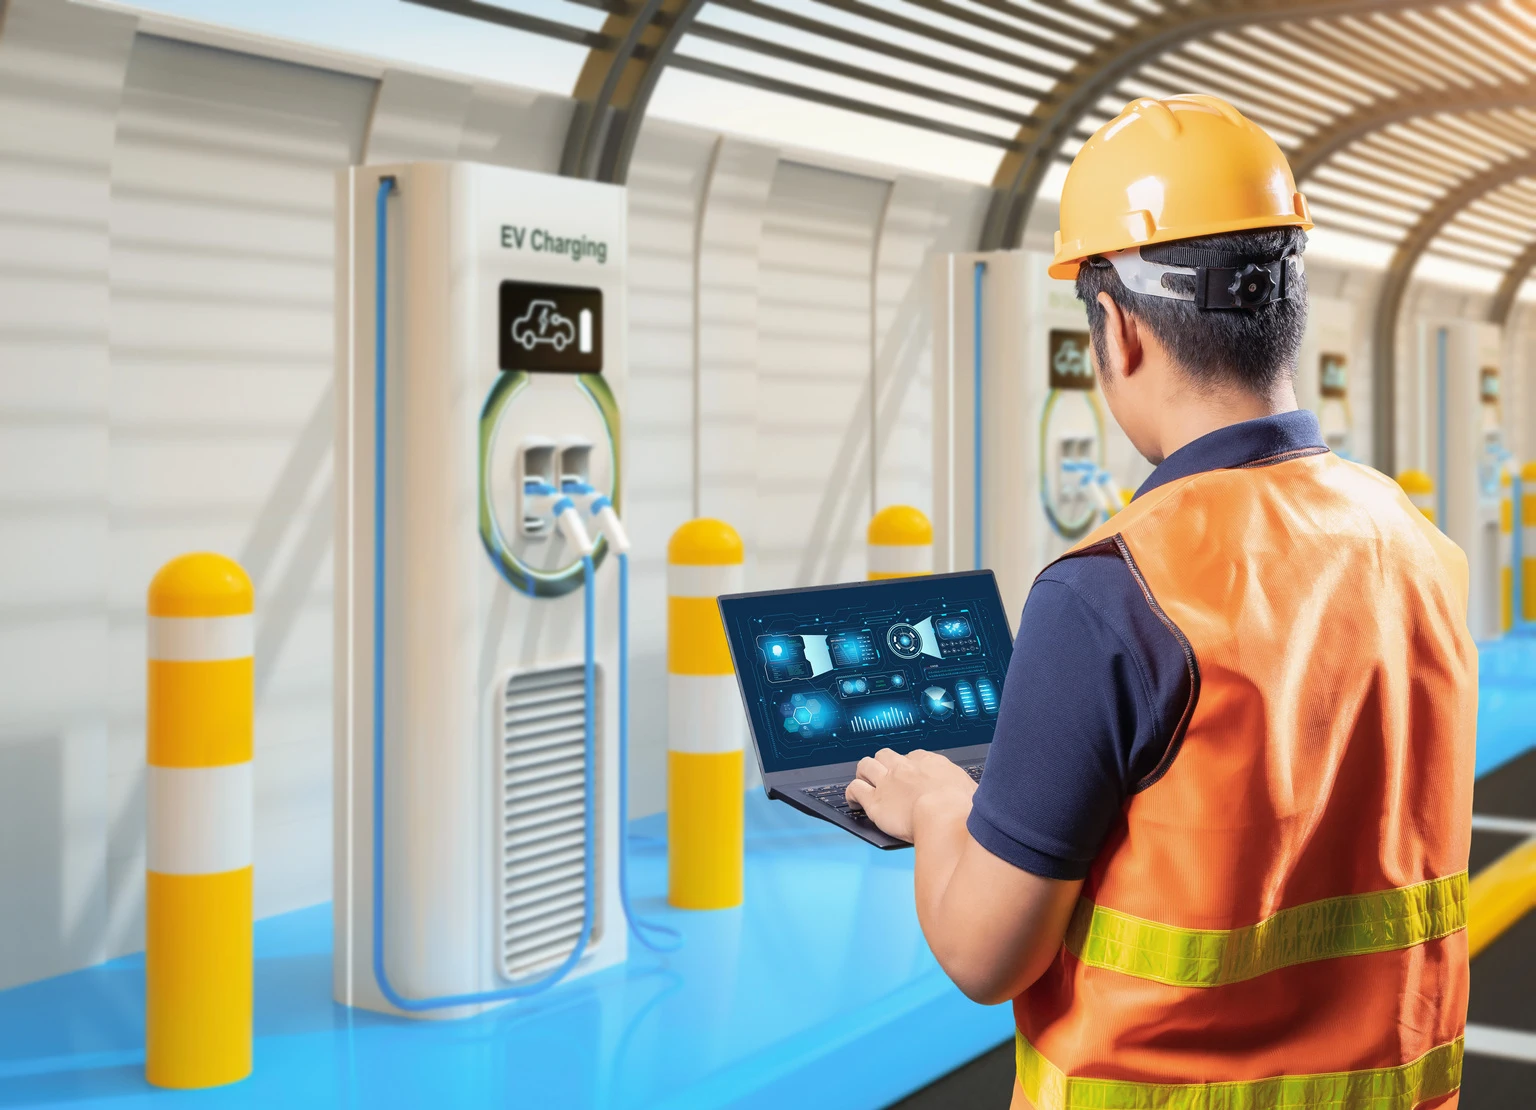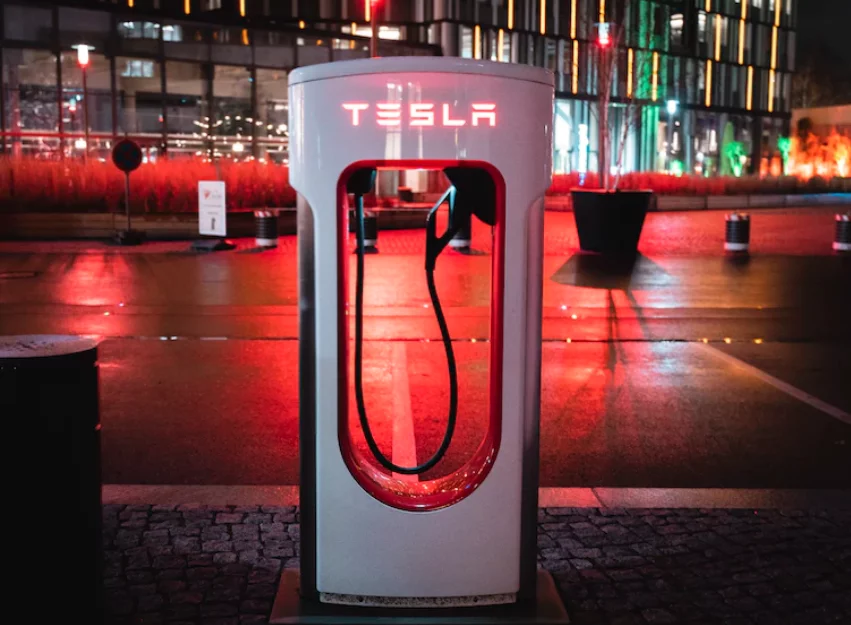
You’ve brought home your new Tesla, and the feeling is fantastic. Congratulations on joining the electric revolution! But now comes the final step to truly unlock the convenience of electric ownership: setting up a dedicated, high-speed charging station right in your New Albany garage. You might be wondering, “What’s the process to get a Level 2 EV charger installed?“
This is where professional expertise is not just helpful—it’s vital. A proper Tesla EV Charger Installation is the difference between a frustrating, slow trickle charge that leaves you range-anxious and waking up every morning with a full battery, ready to cruise down to Columbus or hit the links.
As your trusted local residential and commercial electricians in Columbus, Ohio, and specializing in the modern electrical demands of communities like New Albany, Gahanna, Dublin, and Worthington, Electric Medic understands exactly what it takes. We treat your vehicle’s charging solution as a critical, long-term home upgrade. This comprehensive guide cuts through the technical confusion to walk you through the essential steps, factors influencing costs, necessary electrical upgrades, and why hiring a professional electrician to install your Tesla charger is the only way to ensure safety, efficiency, and code compliance.
Why the Tesla Wall Connector Installation is the Gold Standard for Central Ohio Owners
When it comes to charging your Tesla at home, the Wall Connector (Tesla’s dedicated Level 2 charger) is, without question, the best investment. It provides far more than the basic Mobile Connector that plugs into a standard 120V outlet.
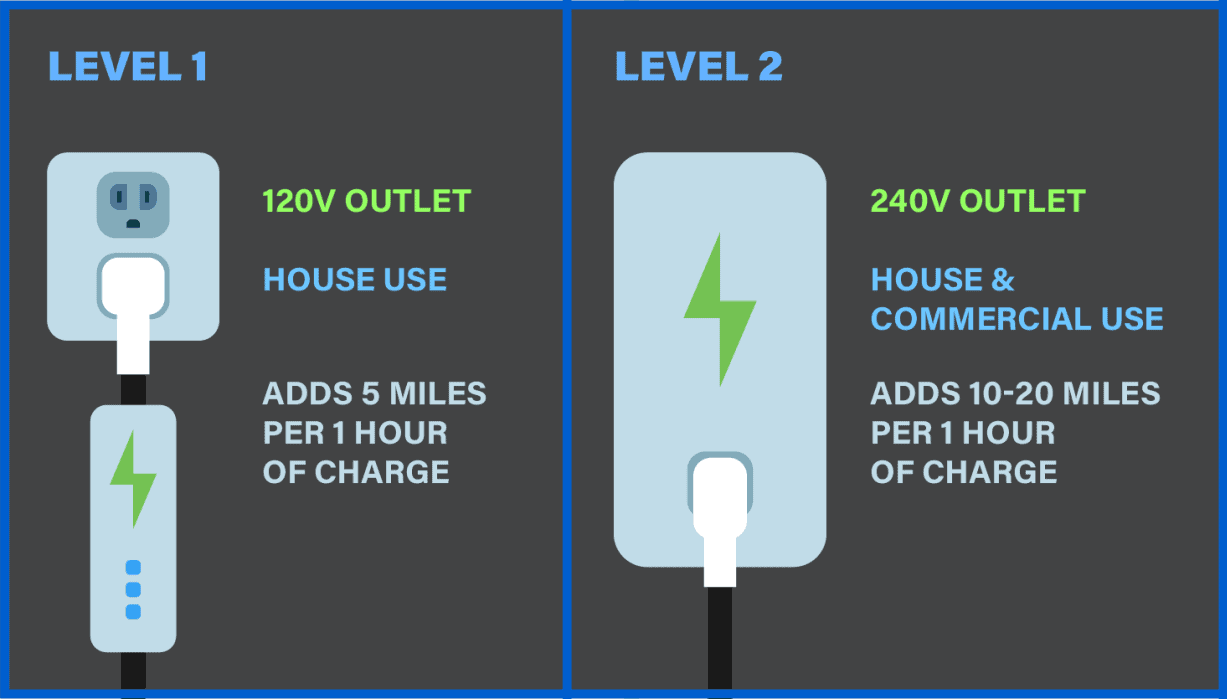
The Critical Difference: Level 2 Charging Speed and Efficiency
The biggest incentive for any Central Ohio EV owner is speed. Consider the comparison:
| Charging Level | Power Source | Amperage | Range Added Per Hour | Typical Time to Full Charge (Model 3) |
| Level 1 (Standard Outlet) | 120V Household Outlet | 12 Amps | 3 to 5 miles | 45+ Hours |
| Level 2 (Wall Connector) | 240V Dedicated Circuit | Up to 48 Amps | 30 to 45 miles | 8 to 12 Hours (Overnight) |
Switching from Level 1 to a professionally installed Level 2 EV charger installation is the difference between anxiety and convenience. For a typical New Albany commute and errands, the Level 2 speed means you can always leave your house with a full or nearly full battery after charging overnight.
Key Benefits of the Tesla Wall Connector
- Optimal Efficiency: The Wall Connector is designed specifically for your vehicle, ensuring the most efficient communication between the car and the charger. This results in faster, more reliable charging with less energy loss.
- Network and Smart Features: The Wall Connector is Wi-Fi enabled, allowing for over-the-air firmware updates and integration with your Tesla app. This feature allows you to monitor usage, view charging history, and remotely manage your charging schedule—perfect for taking advantage of AEP Ohio’s off-peak energy rates.
- Future-Proofing and Compatibility: While designed for Tesla, the North American Charging Standard (NACS) has been adopted by nearly all major automakers. Your Wall Connector is, therefore, an excellent, future-proof Tesla home charger installation for any vehicle you might own down the road.
- Durability and Safety: Rated for indoor and outdoor use, the unit is durable and weather-resistant. Crucially, a professional Tesla wall connector installation electrician ensures the unit is hardwired directly to a dedicated circuit, eliminating the potential failure points and hazards associated with standard outlets.

The 4-Phase Professional Tesla Charger Installation Process Explained in Detail
A seamless Tesla home charger installation requires a rigorous, multi-step approach that goes far beyond simply mounting the box. We break the process into four critical phases, ensuring code compliance, maximum efficiency, and safety for your Columbus home.
Phase 1: The Critical Electrical System Assessment and Permitting
This is the most critical stage, often overlooked by less experienced Tesla charger installers. Skipping this phase can lead to tripped breakers, damaged equipment, or dangerous overloads.
A. The Power Audit: Amperage and Capacity
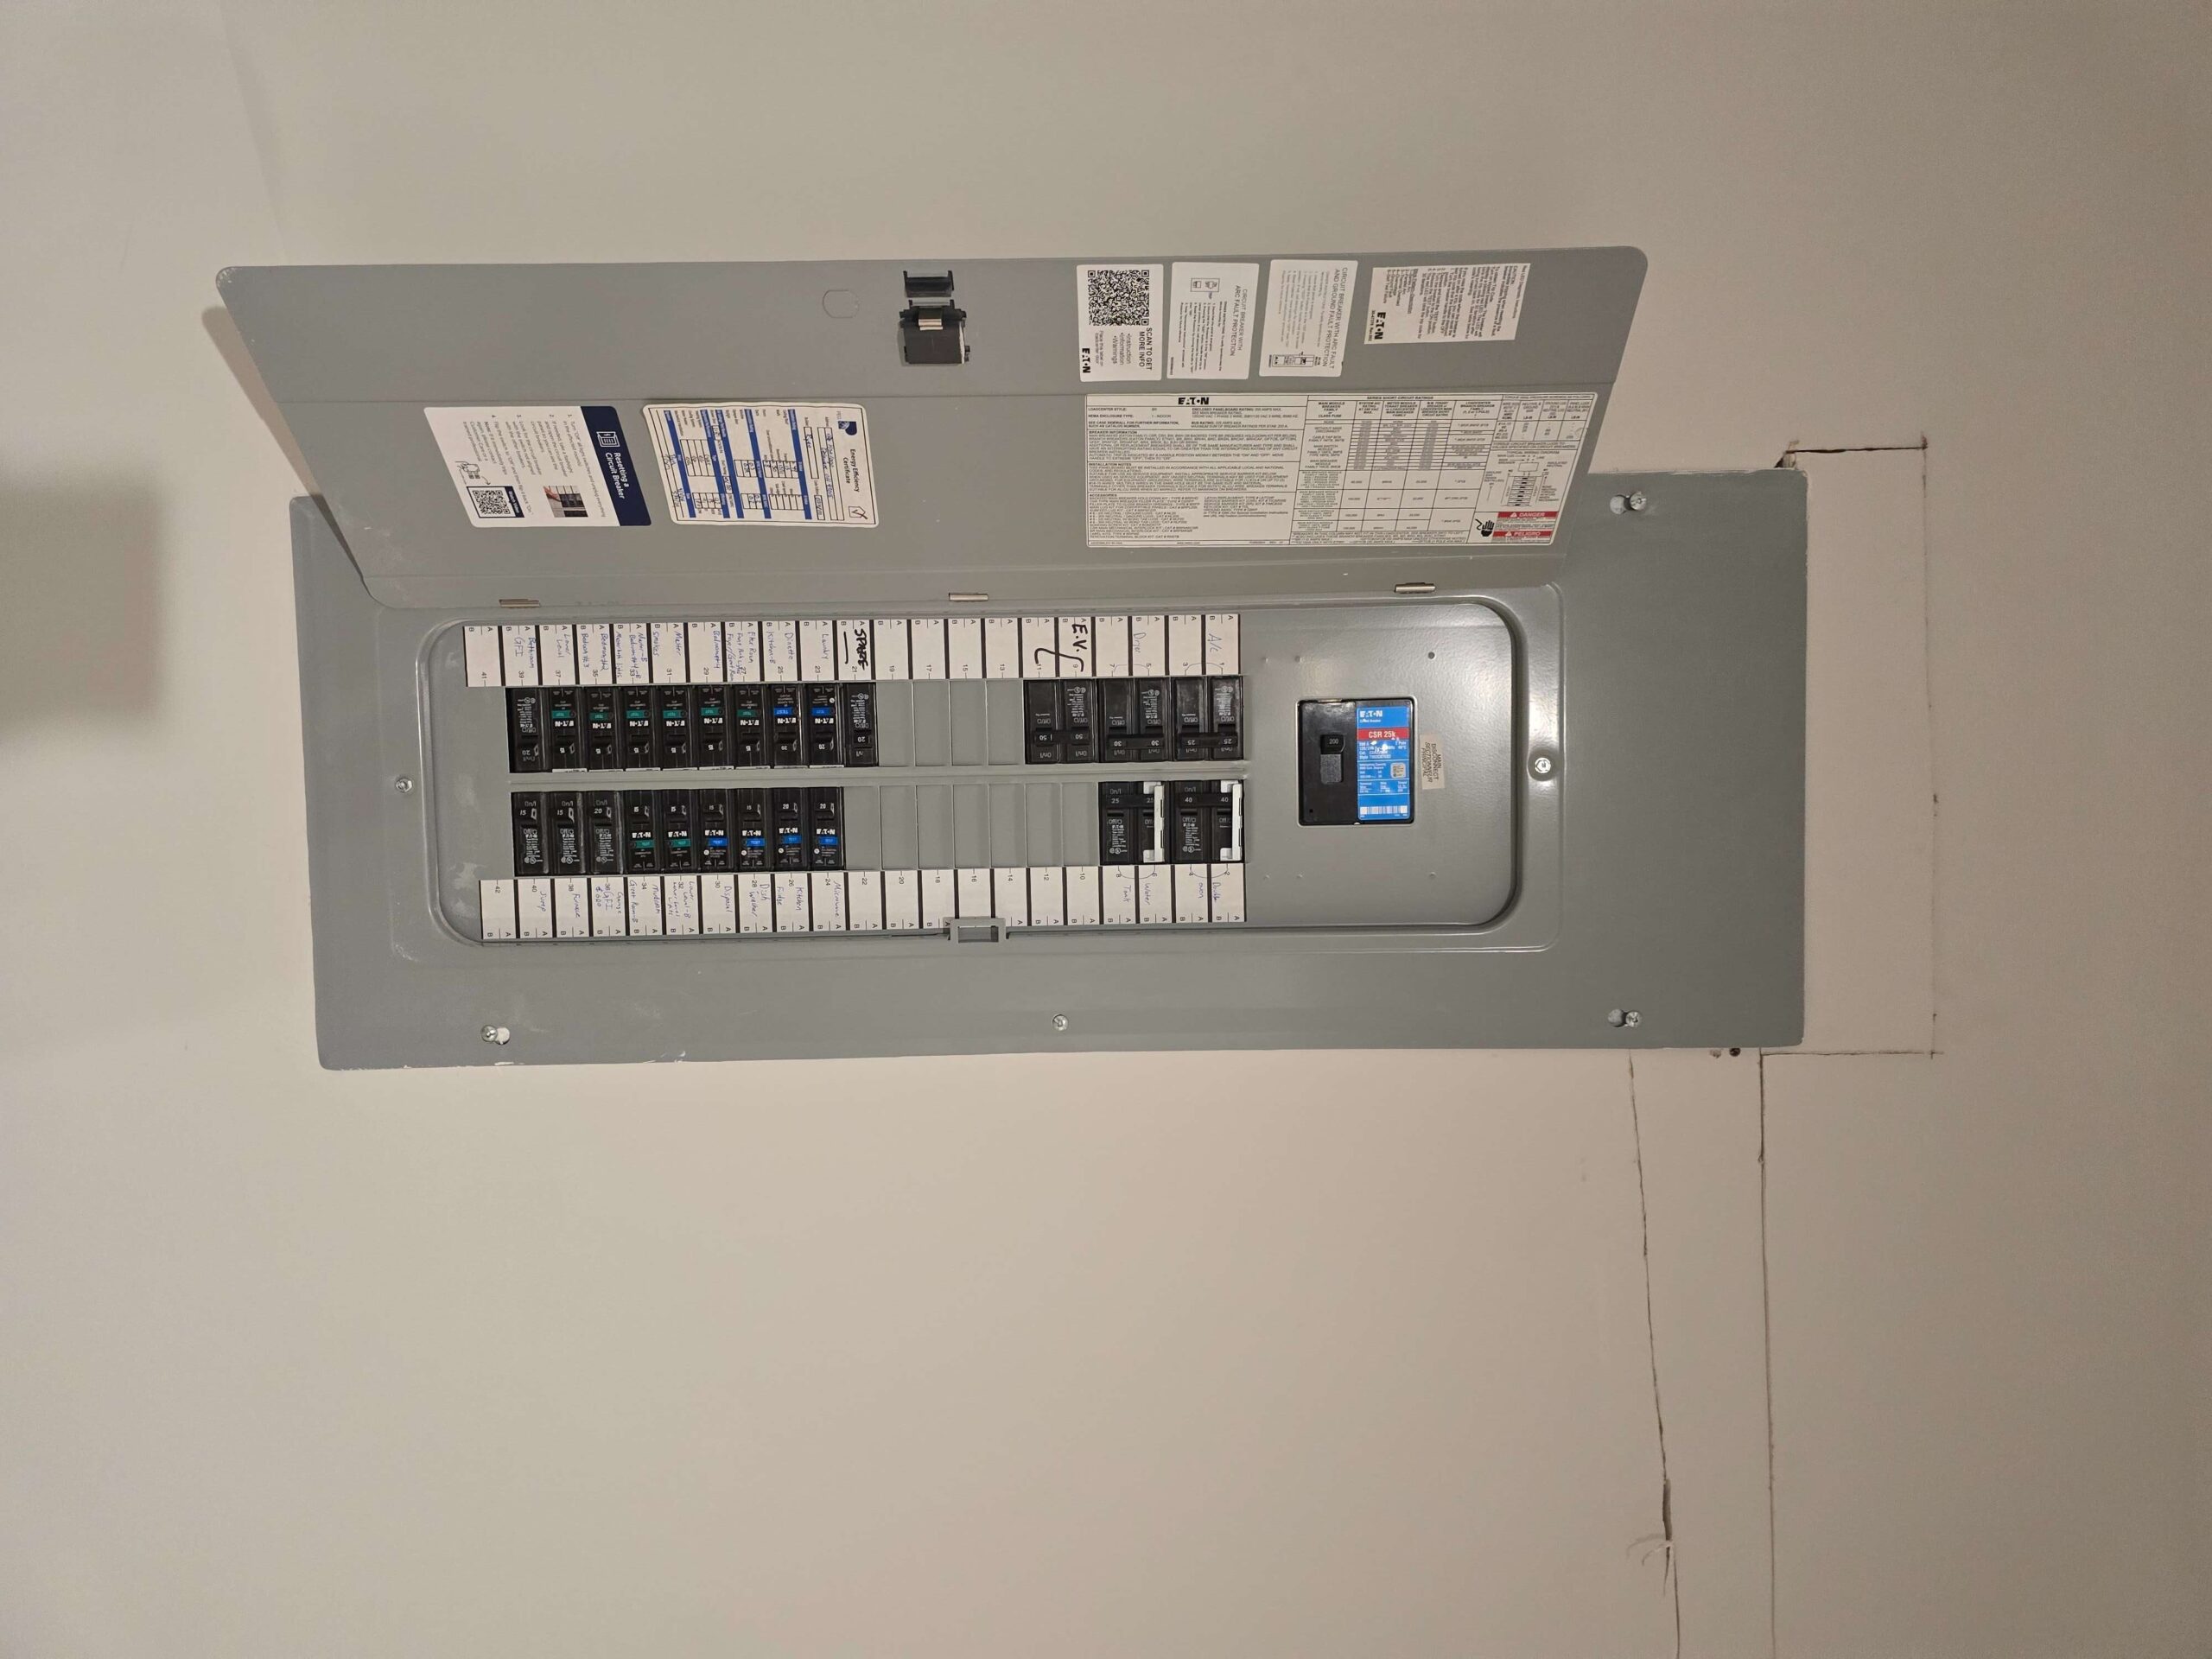
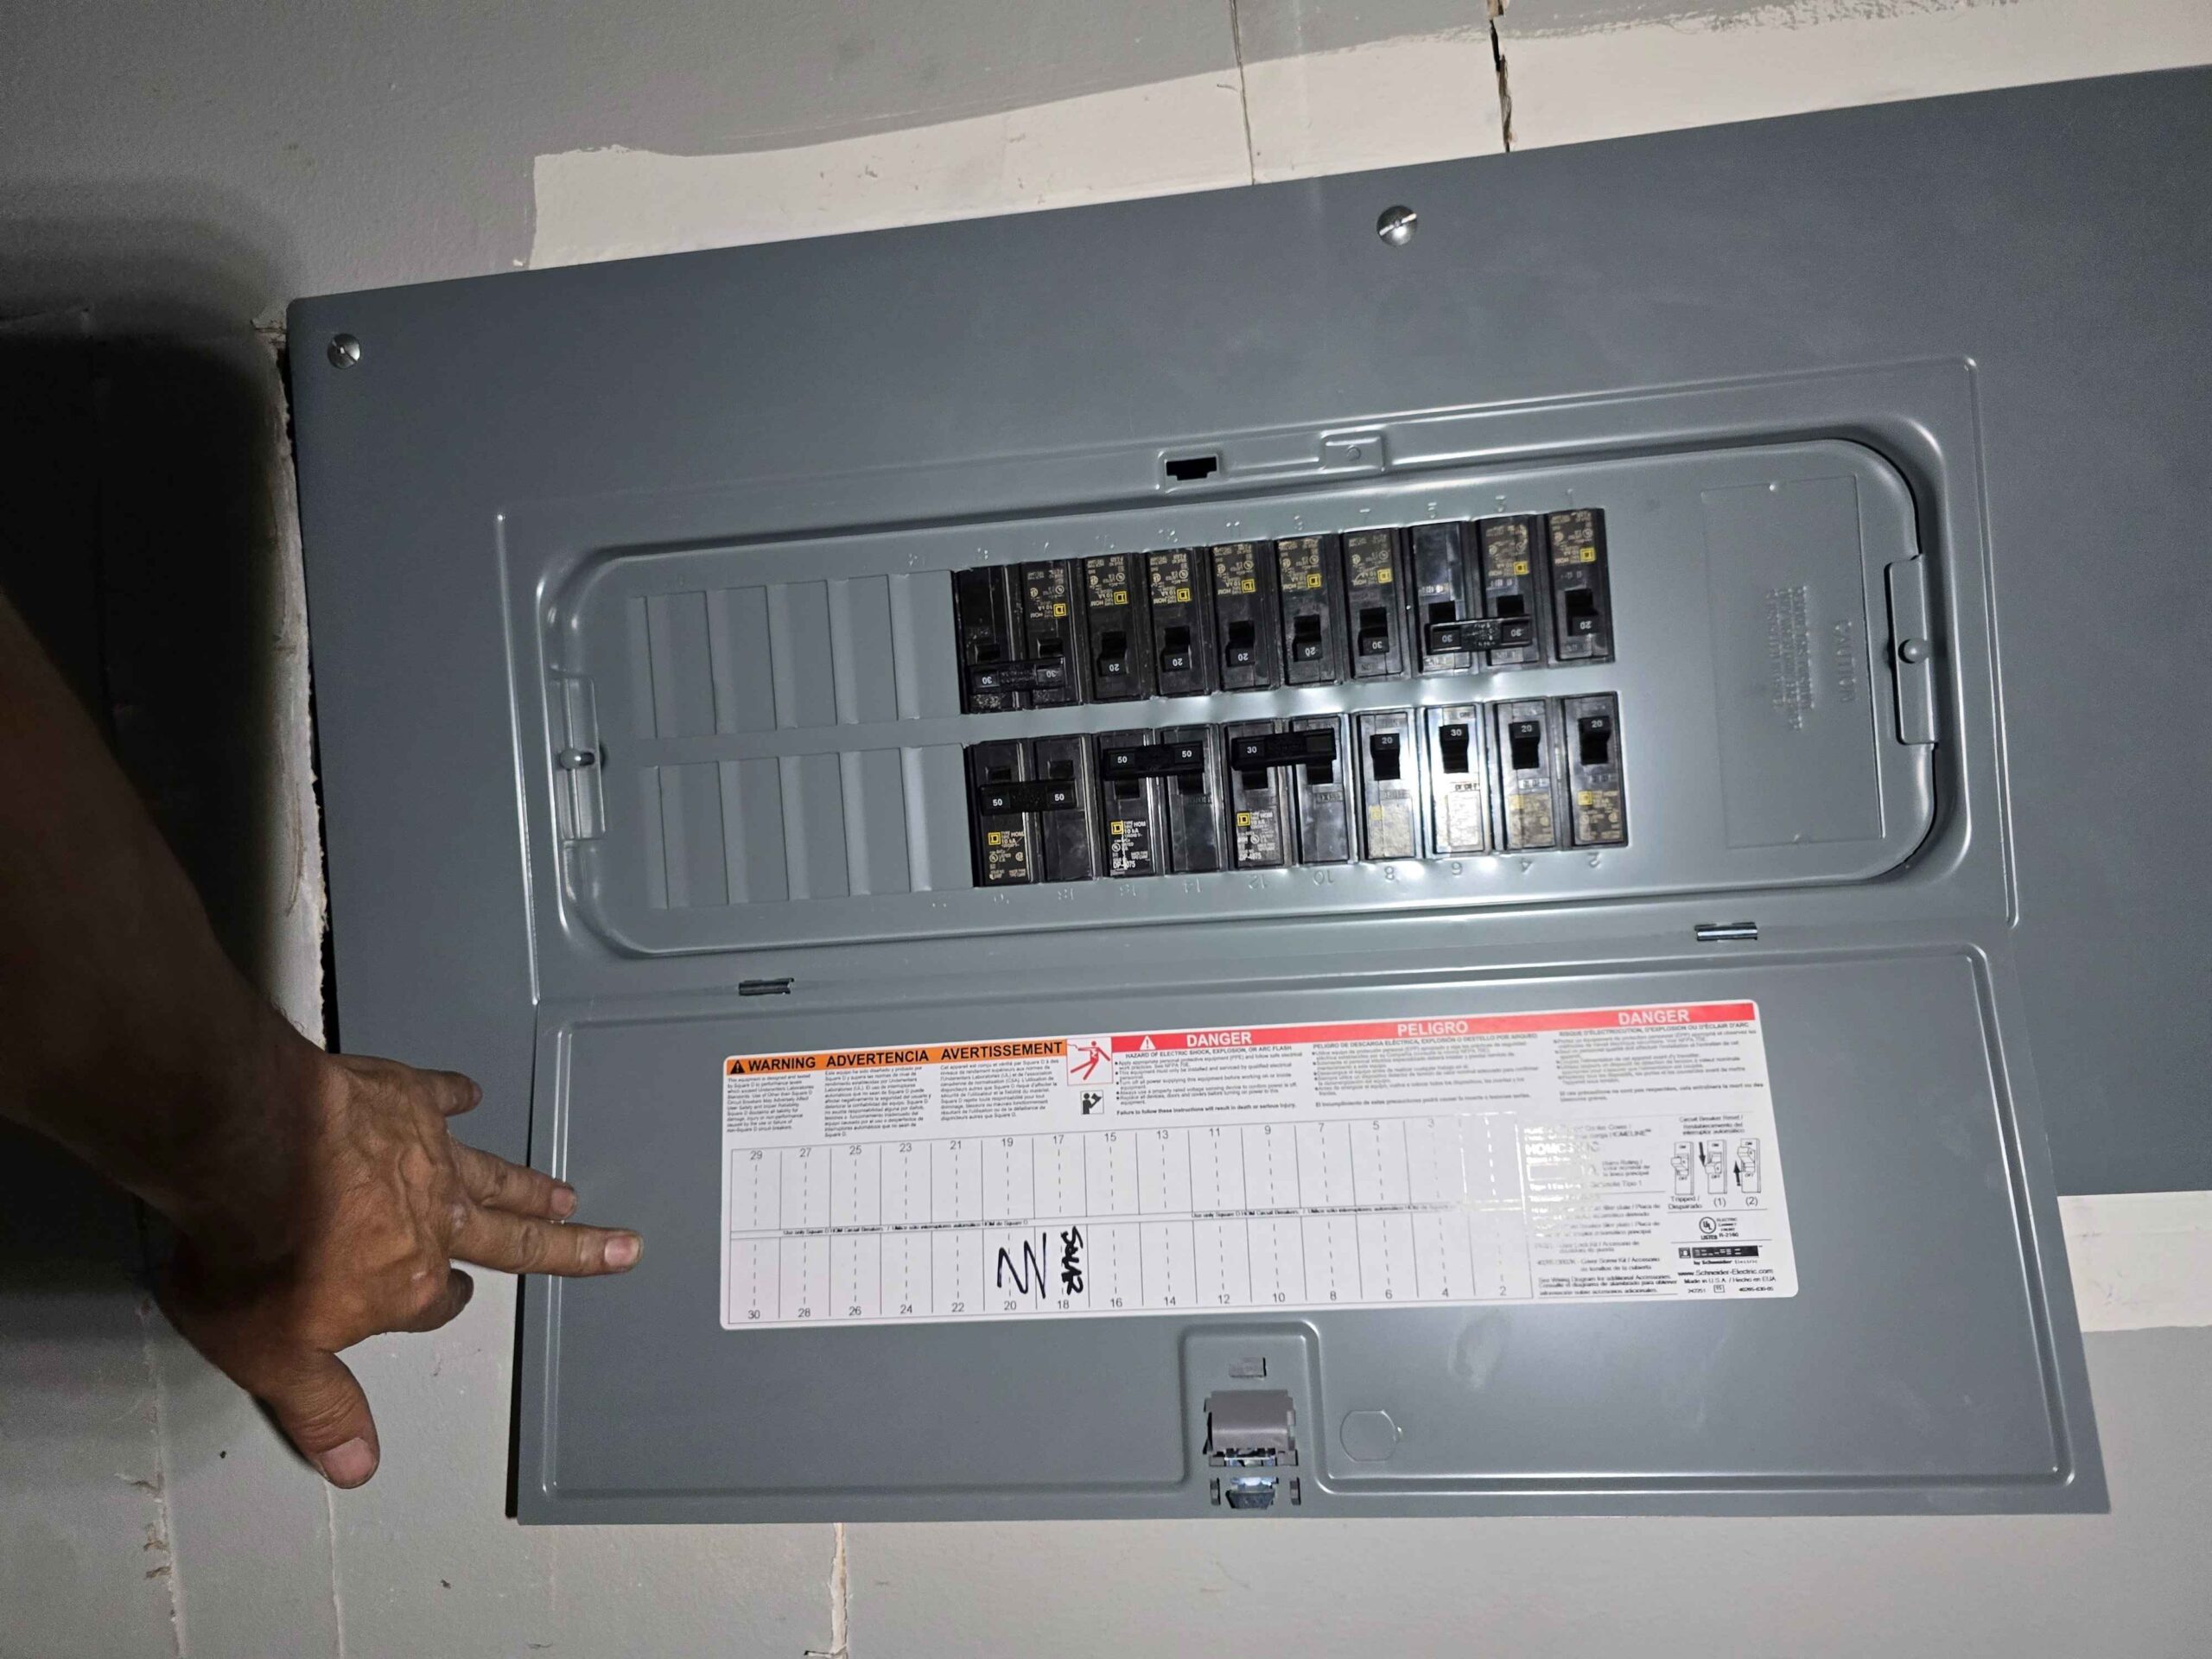
We treat every level 2 charger installation as a major load addition. Your home’s main service panel (breaker box) has a maximum amperage rating (usually 100-amp or 200-amp).
- The Wall Connector Load: To maximize charging speed, we aim for a 48-amp charge rate, which requires a dedicated 60-amp circuit. This is a massive, continuous load; equivalent to running an electric oven and a clothes dryer simultaneously for hours.
- The Breaker Box Test: Our electricians, serving communities from Hilliard to Pataskala, perform a load calculation. We calculate the amperage used by your furnace, AC, water heater, kitchen circuits, and other appliances, and subtract that from your panel’s total capacity.
- Panel Upgrade Scenario (Common in Older Homes): If you have an older 100-amp service—common in many charming Westerville or Worthington homes—you likely do not have the remaining capacity. In this case, a panel upgrade to 200 amps is required before the charger can be safely installed. We handle this entire process, ensuring your home’s main electrical service is ready for the future.
B. Routing and Placement
We map the most efficient path for the new wiring from your main panel to the garage location.
- Efficiency: The shorter the distance, the lower the cost for materials (copper wire is expensive) and labor.
- Safety: The wire must be protected inside metal or plastic conduit, a requirement that can make routing through finished walls or concrete basements complex.
- Location: We mount the connector in a secure, convenient location, ensuring the cable easily reaches your vehicle’s charge port and doesn’t create a tripping hazard.
C. Permitting and Local Code Compliance
In Columbus, Ohio, and surrounding suburbs like Gahanna and New Albany, all new level 2 EV charger installation projects require an electrical permit from the local authority (e.g., city, county, or state building department).
- Handling the Paperwork: Electric Medic handles all the necessary paperwork, submitting the plans and specifications on your behalf.
- Inspection Guarantee: After installation, the work must be inspected by a municipal inspector. Our commitment to code excellence means we guarantee our work will pass inspection the first time, preventing delays and re-inspection fees.
Phase 2: Installing the Dedicated Electrical Infrastructure
This is where the physical transformation takes place, creating a reliable, safe power highway for your Tesla.
A. Main Panel Integration
The work begins at the main electrical panel. We install a new, dedicated, high-quality 60-amp double-pole breaker. This breaker is the safety mechanism that protects the wiring and your car by automatically shutting off the power if a fault or overload occurs. Crucially, this breaker is for the charger and only the charger—it cannot share power with any other appliance.
B. Conduit and Wiring Runs
We install the necessary conduit (piping for the wire) along the determined route. For a 60-amp circuit, we must use thick, heavy-gauge copper wiring (usually 6 AWG).
- Labor-Intensive Runs:
- Finished Basements: If the panel is in a finished basement, we meticulously fish the wires through walls and ceilings, minimizing damage to drywall or trim.
- Exterior Walls: If the wiring must travel along an exterior wall (common in Westerville or Pataskala garages), we use robust, weather-rated outdoor conduit.
- Attics/Crawl Spaces: These areas often require careful navigation and sometimes additional insulation work to maintain fire barriers.
The labor and material costs for this wire run are the single biggest factor determining your final Tesla wall charger installation cost.
C. Grounding and Surge Protection
Ensuring proper grounding is non-negotiable for EV chargers. We verify the charger’s circuit is correctly grounded back to your main panel. For added security, especially in areas prone to summer lightning storms, we can advise on and install supplemental surge protection devices on the circuit or even the main panel to shield your sensitive Tesla electronics from grid spikes.
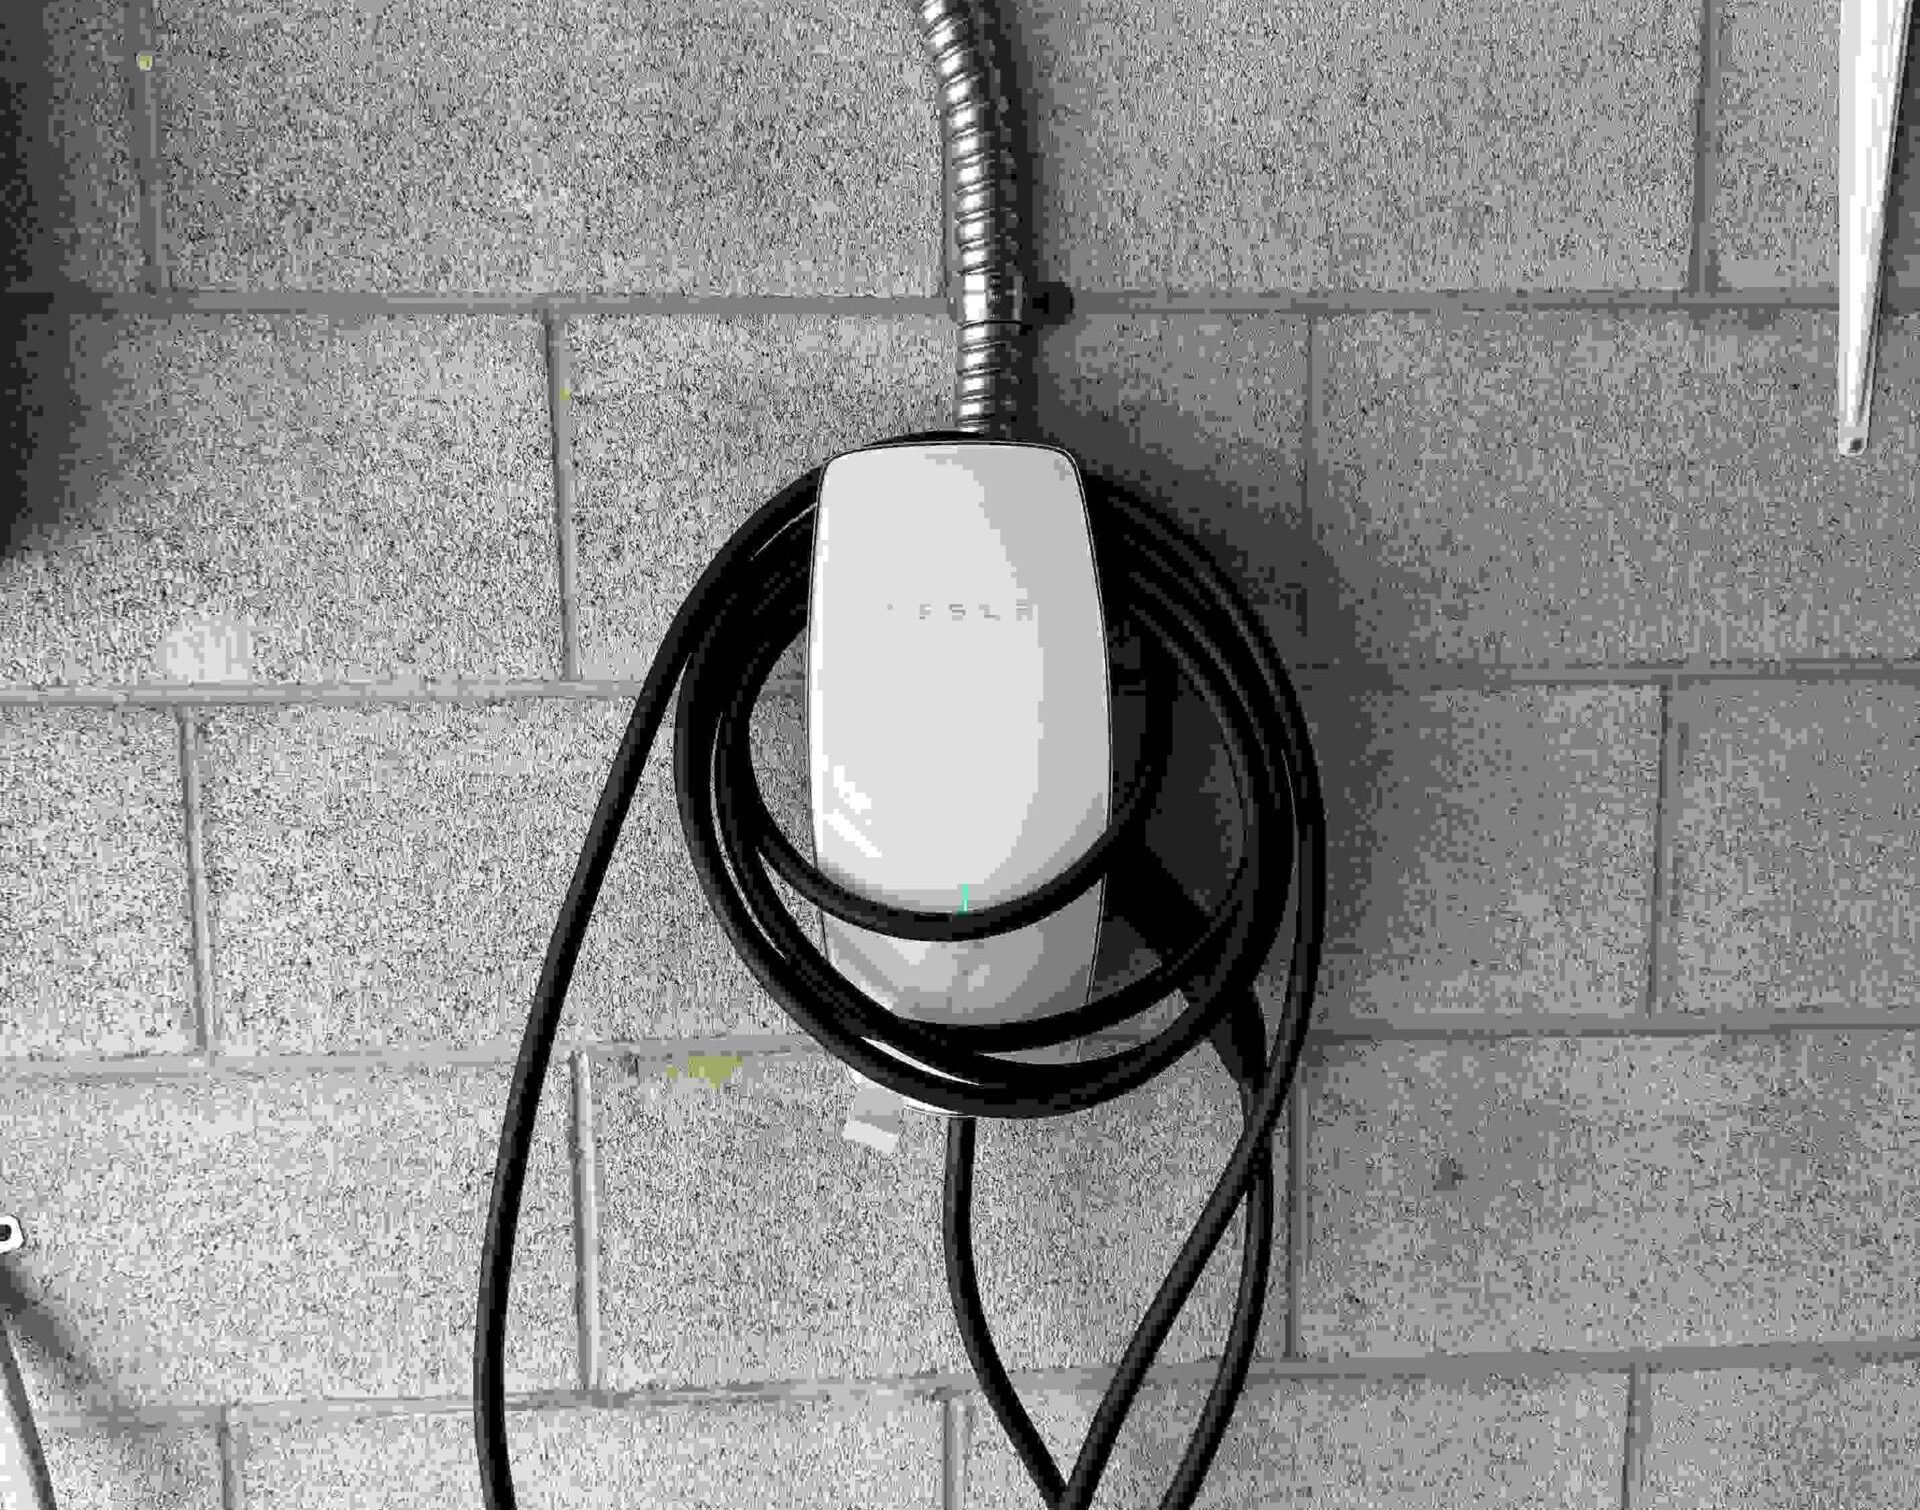
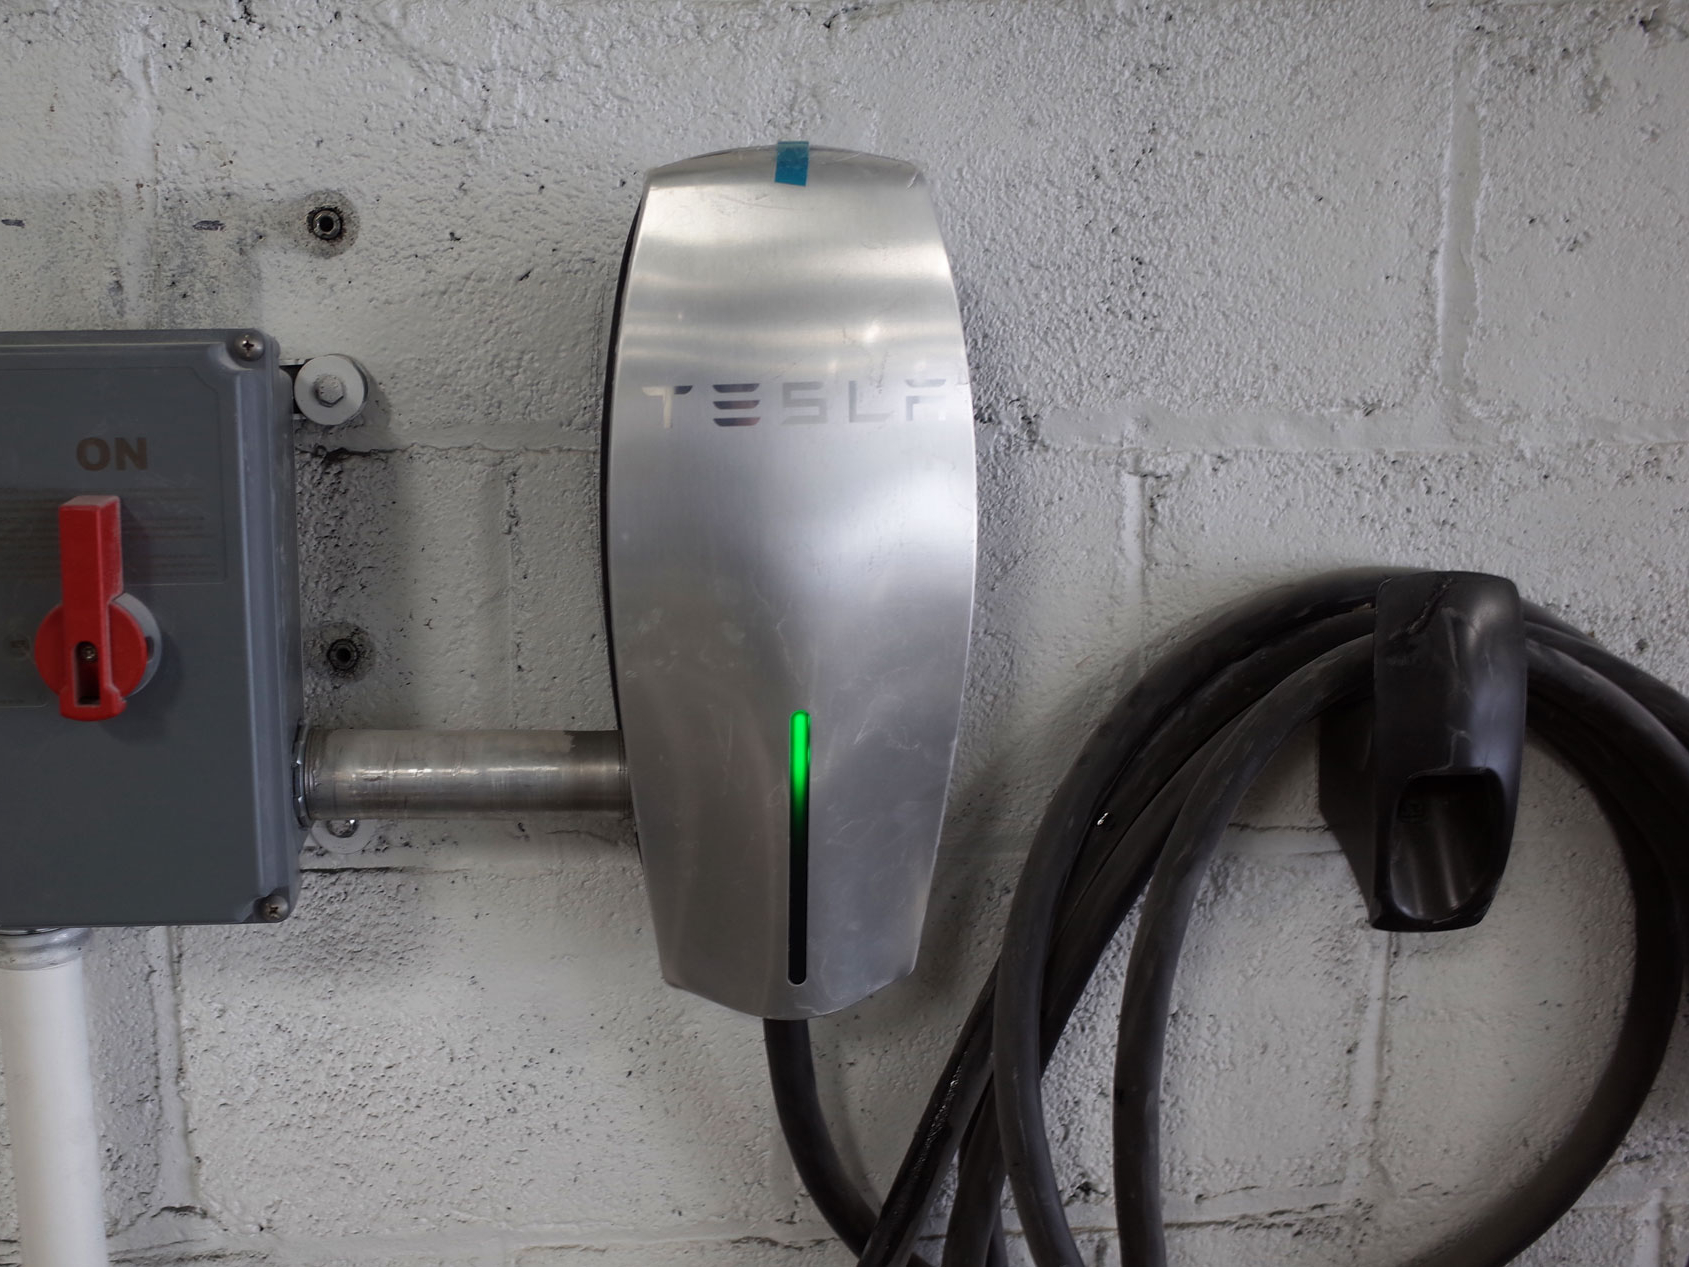
Phase 3: Tesla Wall Connector Installation and Final Connection
With the dedicated circuit in place, the Tesla wall connector installation electrician focuses on mounting and wiring the unit itself.
- Secure Mounting: The connector is mounted securely to the wall studs, typically 4 to 5 feet off the ground, ensuring the cable can easily reach your vehicle’s port without dragging.
- Hardwiring the Unit: The Wall Connector is designed to be hardwired, meaning the wiring runs directly into the back of the unit without an external plug or receptacle. This is more efficient and safer than a plug-in setup, as it eliminates the heat and potential failure points of a large NEMA 14-50 plug.
- Amperage Configuration: Inside the unit, we set the internal dip switches to correspond exactly with the circuit size (e.g., 60-amp circuit set to a 48-amp output). This precise configuration prevents overcurrent and maximizes the charge rate.
The expertise of a certified electrician for a Tesla charger installation is crucial here. They are familiar with the specific internal components and configuration requirements of the Tesla hardware.
Phase 4: Testing, Inspection, and Final Handoff
The job isn’t complete until you are 100% confident in your new setup.
- System Diagnostics: We use diagnostic tools to verify voltage (must be 240V) and confirm the amperage output matches the breaker size.
- Vehicle Test: We plug in your Tesla Model 3 or Model S and verify the vehicle immediately recognizes the charger and begins charging at the maximum rate displayed on your screen.
- Final Inspection: The municipal inspector signs off on the permit, officially certifying that the Tesla EV Charger Installation is safe and compliant.
- Customer Walkthrough: We guide you through the Wall Connector’s features, including Wi-Fi connectivity, charging schedules, and how to properly store the cable and handle the charger. We also advise on using the charger optimally to take advantage of the AEP Ohio off-peak energy rate plans.
Tesla Wall Charger Installation Cost Factors: Local Nuances
The average Tesla charger installation cost in the Columbus area typically ranges from $1,000 to $2,500 for a standard installation, excluding the cost of the charger unit itself ($400–$500) and any major panel upgrades. For more complex jobs, the cost can rise significantly.
Here is a deeper look at what drives the price:
| Cost Factor | Low Cost Scenario (Easy) | High Cost Scenario (Complex) |
| Panel Location to Charger | Directly next to the panel (short 5-15 ft run). | Across the house, requiring a 75+ ft run through finished space. |
| Service Panel Capacity | Modern 200-amp panel with plenty of open breaker space. | The maximum 60-amp circuit requiring expensive, heavy-gauge wire. |
| Wall Type | Drywall in an open garage for easy mounting. | Brick, concrete, or stone (requires specialized masonry work and drilling). |
| Circuit Size | A slower 30-amp circuit for moderate charging needs. | The maximum 60-amp circuit requires expensive, heavy-gauge wire. |
| Outdoor Requirement | Inside a climate-controlled garage. | Outdoor EV Charger Installation (requires more durable conduit and weather-proofing). |
A good Tesla wall connector installation professional in New Albany, OH, will provide an itemized quote detailing materials, labor, and permit fees, ensuring transparency.
Why You Must Choose an Expert Electrician Tesla Charger Installer
The high current draw of a level 2 home charger makes it vastly different from installing a new light switch. Choosing the wrong Tesla home charger installer or attempting a DIY job is risky.
The Hidden Hazards of Amateur Installations:
- Thermal Runaway and Fire: Undersized wiring for a 60-amp load, or loose terminals inside the breaker box, creates excessive heat. This heat can melt plastic components, degrade wire insulation, and ignite nearby building materials—a terrifying reality that a licensed Tesla charger electrician prevents.
- Tripping Breakers (Nuisance and Danger): If the load calculation is wrong, the new circuit will constantly trip the main breaker, leaving you with no power and potential damage to the charger unit.
- The Federal Tax Credit Requirement: To qualify for the up to $1,000 federal EV charger tax credit, you need the installation to be performed by a reputable, licensed contractor who can provide documented proof of costs and labor. An amateur installation jeopardizes this valuable incentive.
By choosing Electric Medic, a local Tesla charger installation near me company, you hire licensed, bonded, and insured professionals who are experts in this specific technology. We guarantee a safe, reliable, and compliant installation.
READ ALSO: EV Charger Rebates for Your Home Charger Installation, Columbus, OH
FAQs: Your Tesla EV Charger Installation Questions Answered
Q: Can I install the Tesla Wall Connector outside my garage?
A: Yes, the Tesla Wall Connector is weather-rated for outdoor use. We perform many outdoor EV Charger Installation jobs, particularly in older neighborhoods in Gahanna or Worthington, where garages are detached or non-existent. We ensure the wiring and conduit are fully protected against Central Ohio weather.
Q: What is the benefit of hardwiring the Wall Connector versus using a NEMA 14-50 outlet?
A: Hardwiring is safer and faster. A hardwired installation on a 60-amp circuit allows the Wall Connector to pull up to 48 amps. A NEMA 14-50 outlet is typically limited to a maximum of 40 amps due to safety codes, resulting in slower charging. Hardwiring also eliminates the risk of plug and receptacle overheating.
Q: Does my new Tesla Model Y charger installation need a separate meter for AEP Ohio’s EV rate?
A: Not usually. AEP Ohio’s Plug-In Electric Vehicle (PEV) rate is generally a time-of-use rate applied to your single, whole-home meter, rewarding you for charging during off-peak hours (usually overnight). A separate meter is typically only required for commercial or public charging stations.
Q: How long does the actual Tesla charger installation take?
A: Once the permit is secured, a standard installation (panel next to the garage) can be completed in 4 to 8 hours. A complex installation involving a long wire run, finished walls, or a panel upgrade can take 1 to 2 days.
READ ALSO: How Long Does a Full Panel Upgrade Take? An Expert’s Timeline for Columbus, OH Homeowners
Q: If I already have an old 240V appliance outlet (like a dryer), can I use that circuit for my new Level 2 EV charger installation?
A: No, you must install a new, dedicated circuit. The EV charger is a continuous load, meaning it draws high power for hours. Standard appliance circuits are not designed for this type of sustained demand and must be replaced with one sized specifically for the charger’s needs.
Q: I live in a condo in Dublin. Is Tesla charge installation possible there?
A: Yes, but it requires coordination. We often work with HOAs and property managers in Dublin and New Albany. You will need permission from the association, and the installation may involve running conduit in common areas, which can add to the complexity and cost. We can help navigate these requirements.
Q: Should I buy the Wall Connector myself, or should Electric Medic provide it?
A: We highly recommend you purchase the Wall Connector directly from Tesla to ensure you get the latest model and the full manufacturer’s warranty. We will handle all the professional labor and installation materials.
Q: Does a Tesla home charger installation near me require specific wiring?
A: Yes. Tesla recommends using the largest possible wire (up to 6 AWG) to ensure minimal voltage drop and maximum charging speed, especially for runs over 50 feet. Our Tesla wall connector installation electrician will calculate the exact wire gauge needed based on the distance from your panel.
Q: What is “Demand-Side Management” and how does it relate to the Tesla EV Charger Installation?
A: For homes with multiple large loads (e.g., a pool heater, a second EV charger, or a heat pump) and a limited panel capacity, we can install a system that manages power flow. It allows the charger to automatically reduce its charge rate when the other appliances are running, preventing the main breaker from tripping and avoiding a costly panel upgrade.
Q: Why should I choose a local Columbus company over a national installer?
A: A local company like Electric Medic is invested in the community, knows the specific inspection procedures in New Albany, Powell, and Gahanna, and offers superior, timely service for any future electrical maintenance or support, unlike transient national contractors.
Ready to Power Your Tesla? Trust the Local Experts. Call (614) 866-6020
Your Tesla is an investment in the future, and its charging system deserves the highest quality installation. Don’t compromise the speed, efficiency, or safety of your vehicle by settling for anything less than a professional Tesla EV Charger Installation.
At Electric Medic, we are the licensed, local experts for residential and commercial electrical needs across Columbus, Ohio, including New Albany, Dublin, Lancaster, Worthington, Westerville, Gahanna, Hilliard, Powell, Pataskala, and beyond. We are the trusted electrician for Tesla charger services, ensuring your setup is fast, safe, and fully compliant with all local codes.
Don’t delay enjoying the ultimate convenience of your Tesla. Contact Electric Medic today to schedule a consultation and get a precise, itemized quote for your Tesla Wall Connector installation. Get the professional service you deserve and start every drive with a full battery.